PDF breakdown
Label the PDF's pages, steps, objects and texts, so they can become pictures for your cards.
The PDF breakdown is where you tell the studio what's on each page of your manual. You draw a step around each step of the instructions, and objects and texts inside it. Each one you draw becomes an asset: a picture or words you can put on a card.
It opens on its own once a new manual's PDF is checked, or from the PDF breakdown button on a manual in the studio. Drawing needs a computer or a tablet: on a phone the PDF breakdown is for review, as On a tablet or a phone describes.
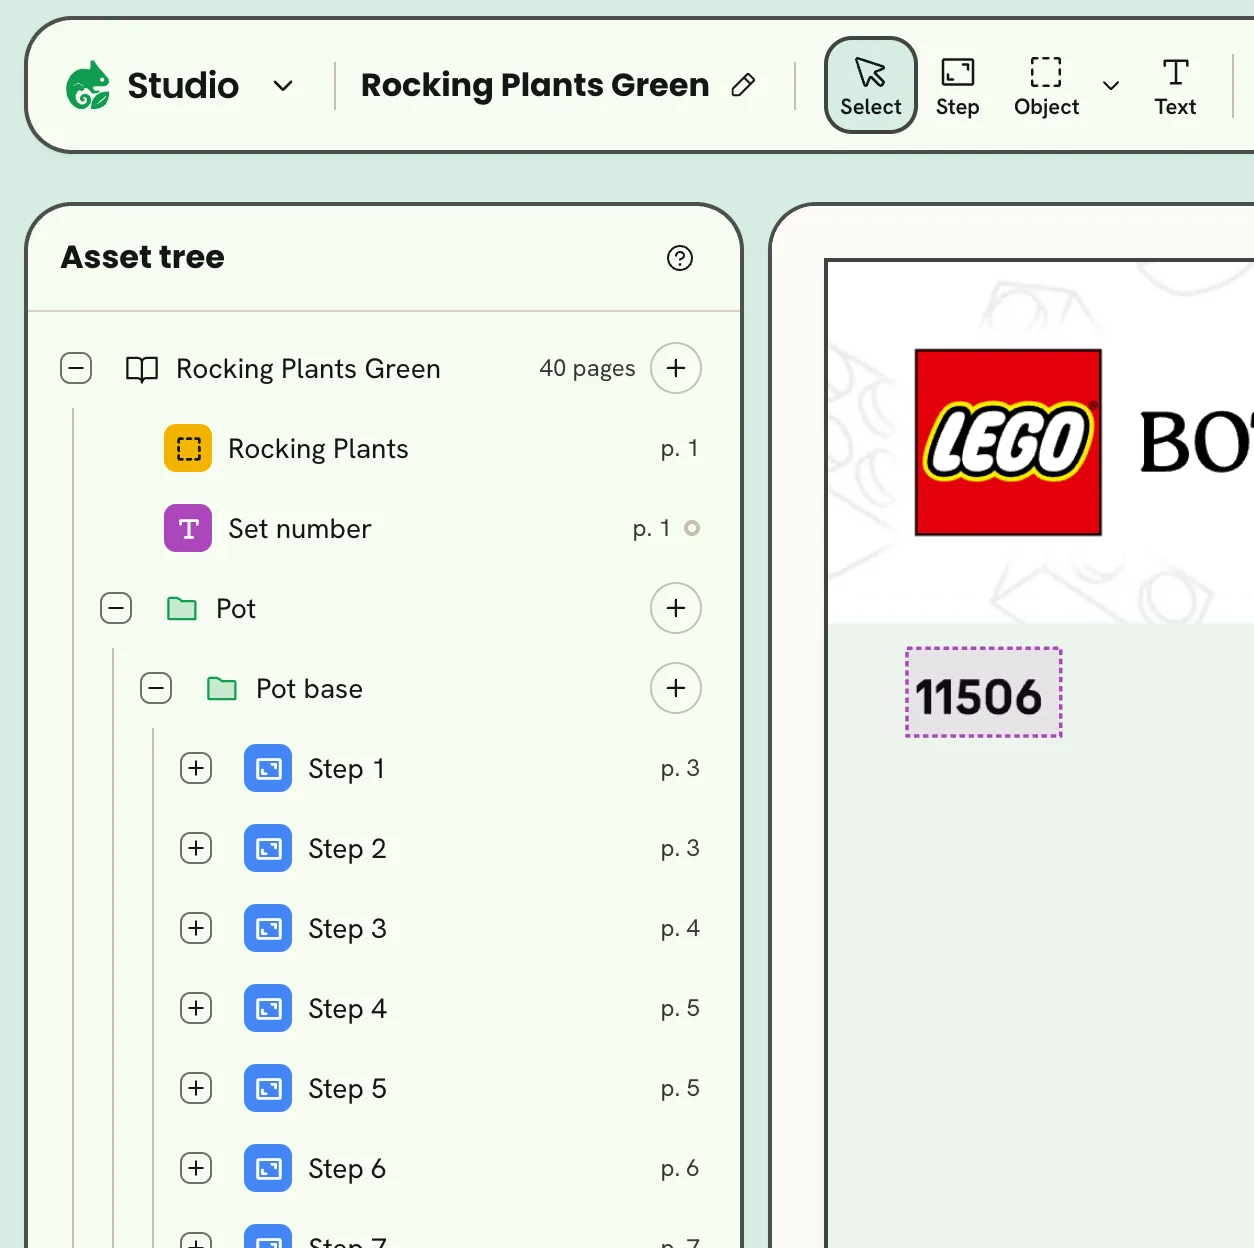
- 1Drawing tools
- 2Asset tree
- 3Page and zoom
- 4Pages
- 5Generate assets
- Drawing tools pick what you draw next.
- The asset tree lists everything you've drawn: groups, then steps, then what each step holds.
- The pages scroll in one column. The bar at the bottom moves between pages and zooms; ⌘ and the scroll wheel, or a pinch, zoom too.
- The pages rail shows every page with how many regions it has. Click one to go there, or hide the rail with ›; ‹ Pages brings it back. A narrower window starts with it hidden.
- Generate assets saves, then turns every region into its asset in the asset library.
The tools

- 1Select
- 2Step
- 3Object
- 4Box or polygon
- 5Text
- 6Remove background
- 7Remove color
- 8Keep color
| Tool | Key | What it does |
|---|---|---|
| Select | Esc | Click a region on the page to select it. |
| Step | 1 | Draws a step. It holds every object and text drawn inside it. |
| Object | 2 | Draws a thing a step needs or makes: a part, a tool, the finished result. |
| Text | 3 | Draws words that should stay words on a card, like an instruction or a warning. |
Draw a region
- Pick Step, Object or Text.
- Drag across the page to draw a box. For an object, the caret next to Object switches to Polygon (or press O): click its corners, then click the first corner again or double-click to close it.
- Name it in the card at the foot of the asset tree. Press Esc to stop drawing.
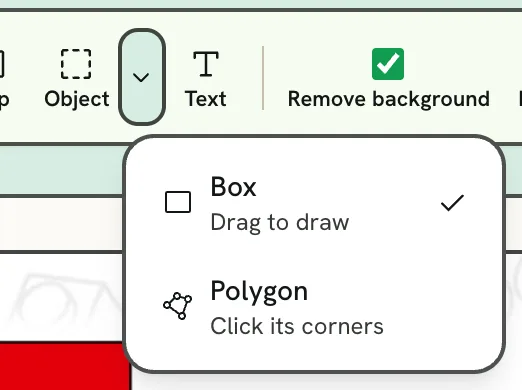
- 1Box: drag to draw
- 2Polygon: click its corners
To change a polygon, ⌘-click its outline to add a corner, or ⌘-click a corner to remove it.
On a touch screen, Undo corner and Done appear over the page while you draw a polygon, and a selected polygon's card has an Edit corners switch: while it is on, tap the outline to add a corner or a corner to remove it. Select puts a drawing tool down, as Esc does.
Select and edit what you drew
Click a region on the page, or its row in the asset tree. The page scrolls to it, and the card at the foot of the tree shows what you can change.
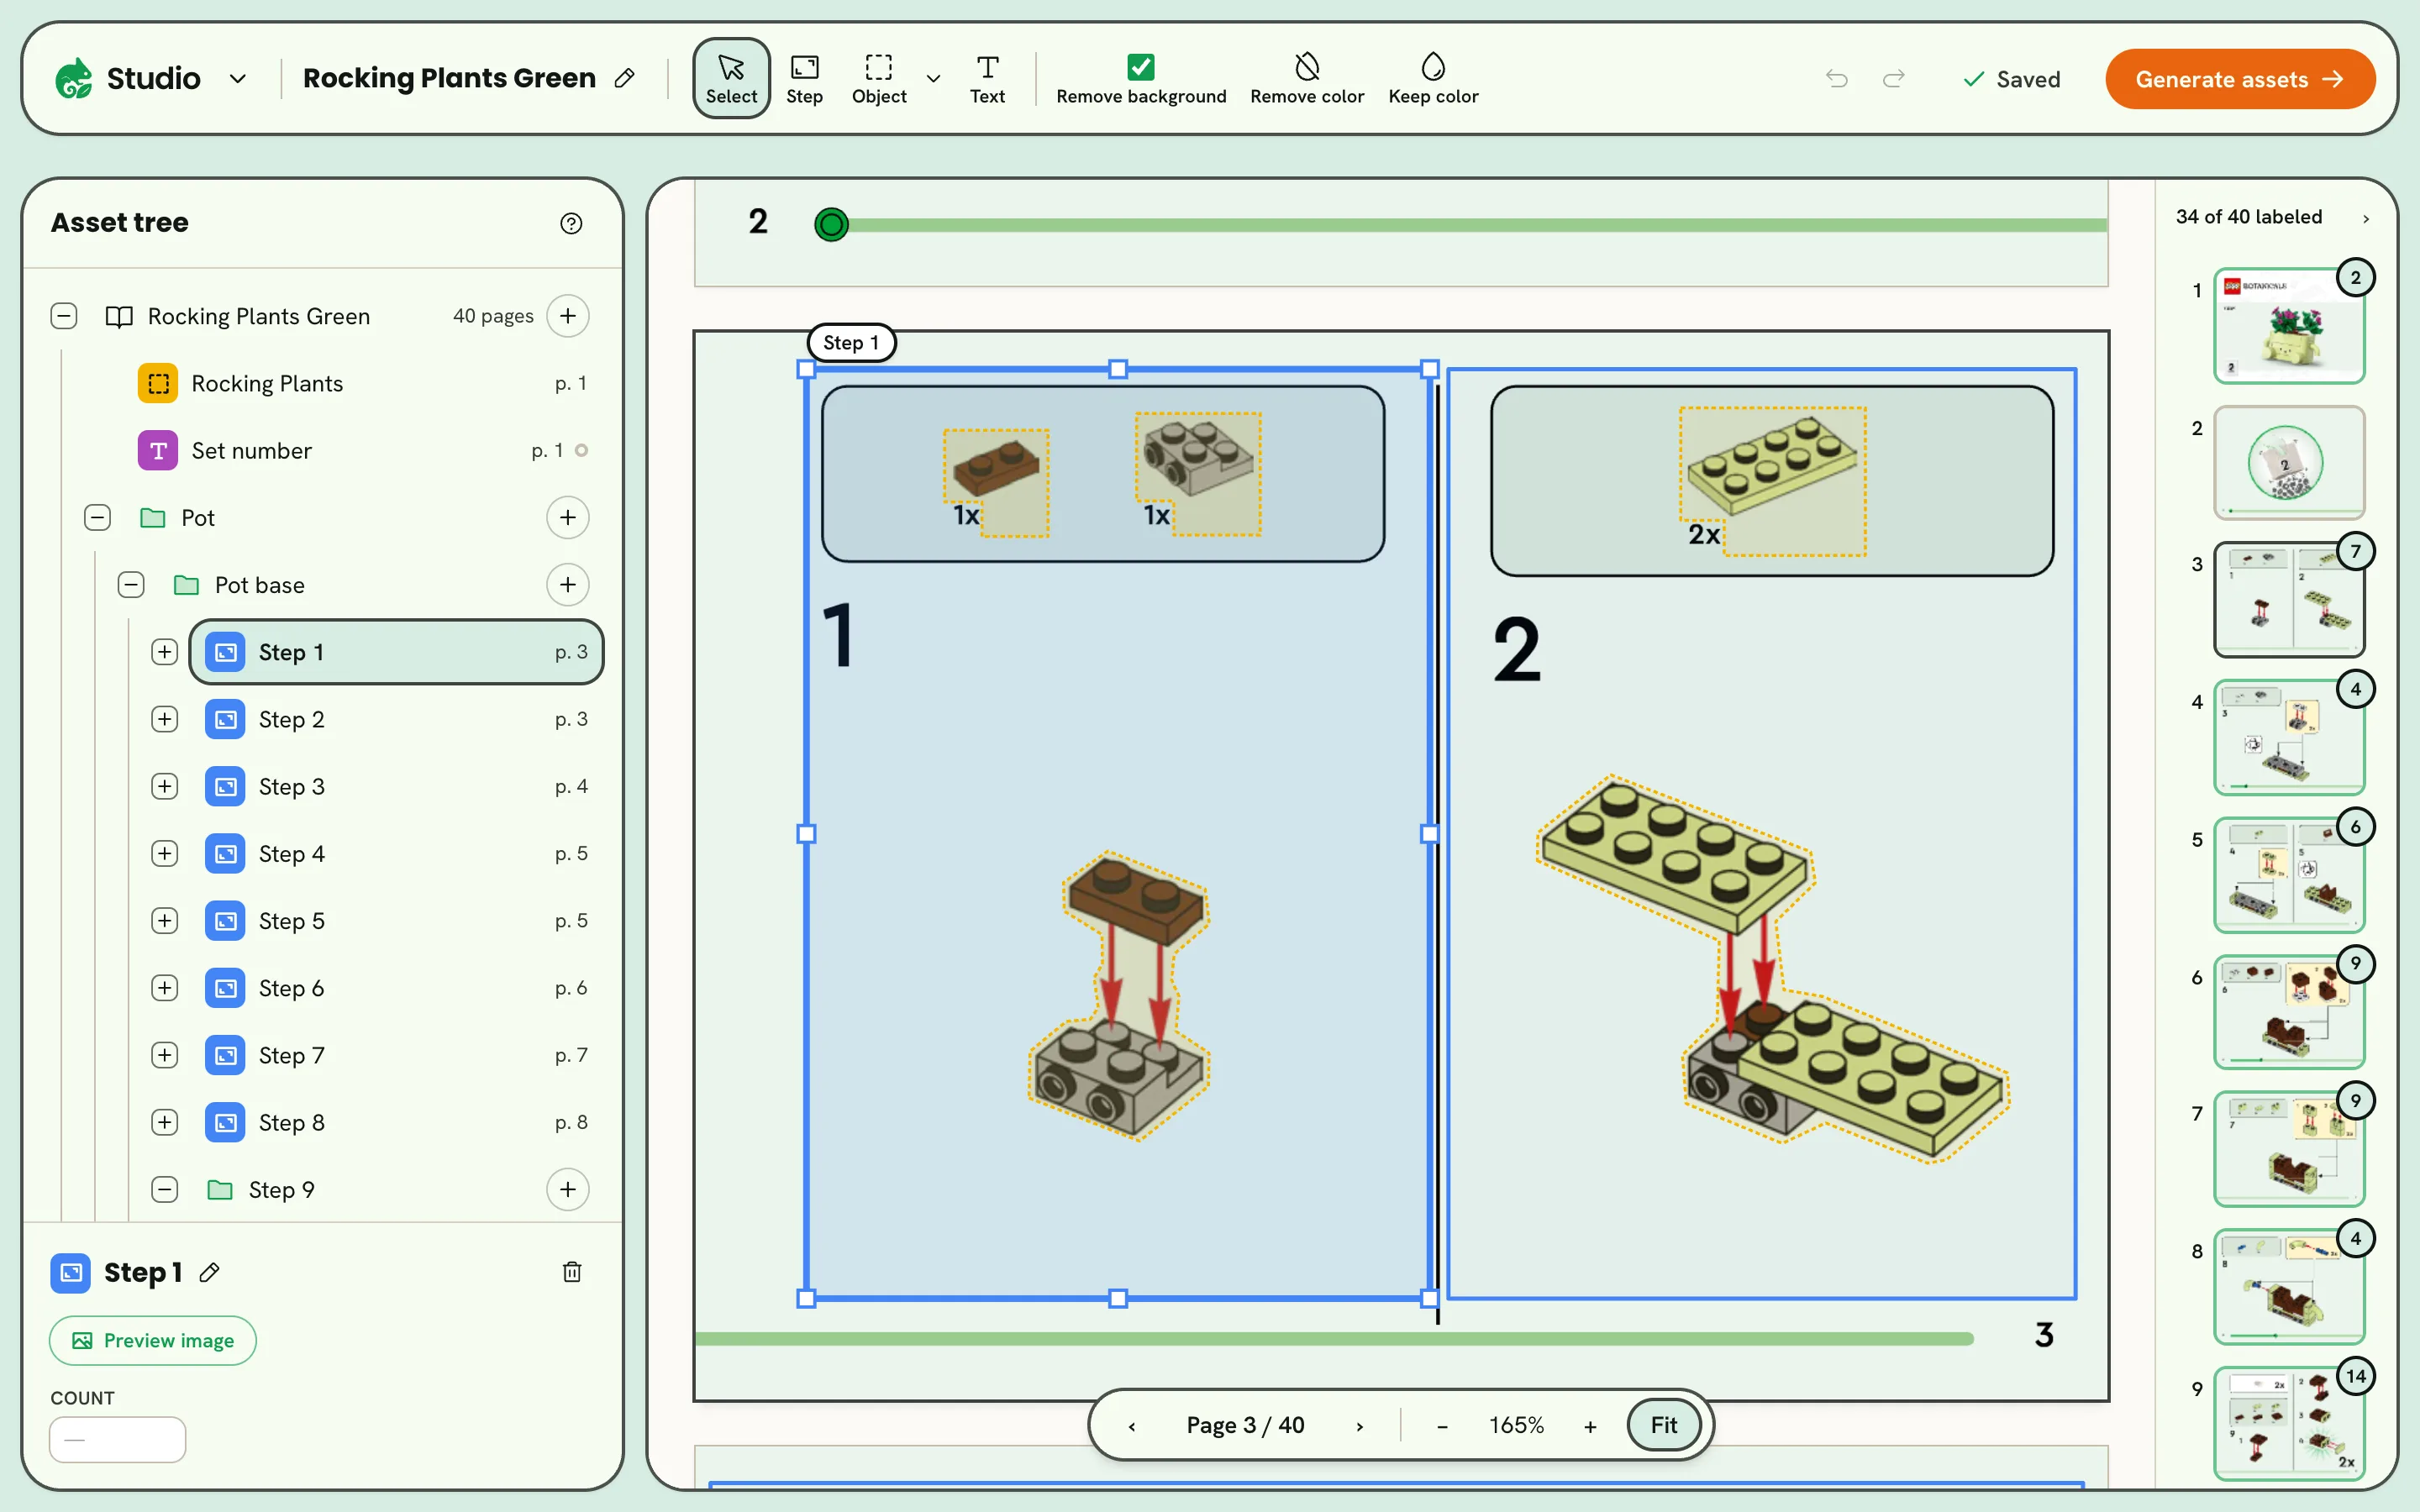
- 1The selected step
- 2Preview image
- 3Its page
- A step or an object has Preview image, to see and fix the picture it will make, and a count: how many of it the step uses.
- An object can switch between box and polygon.
- A text holds the words it shows. Type them in, as they're printed.
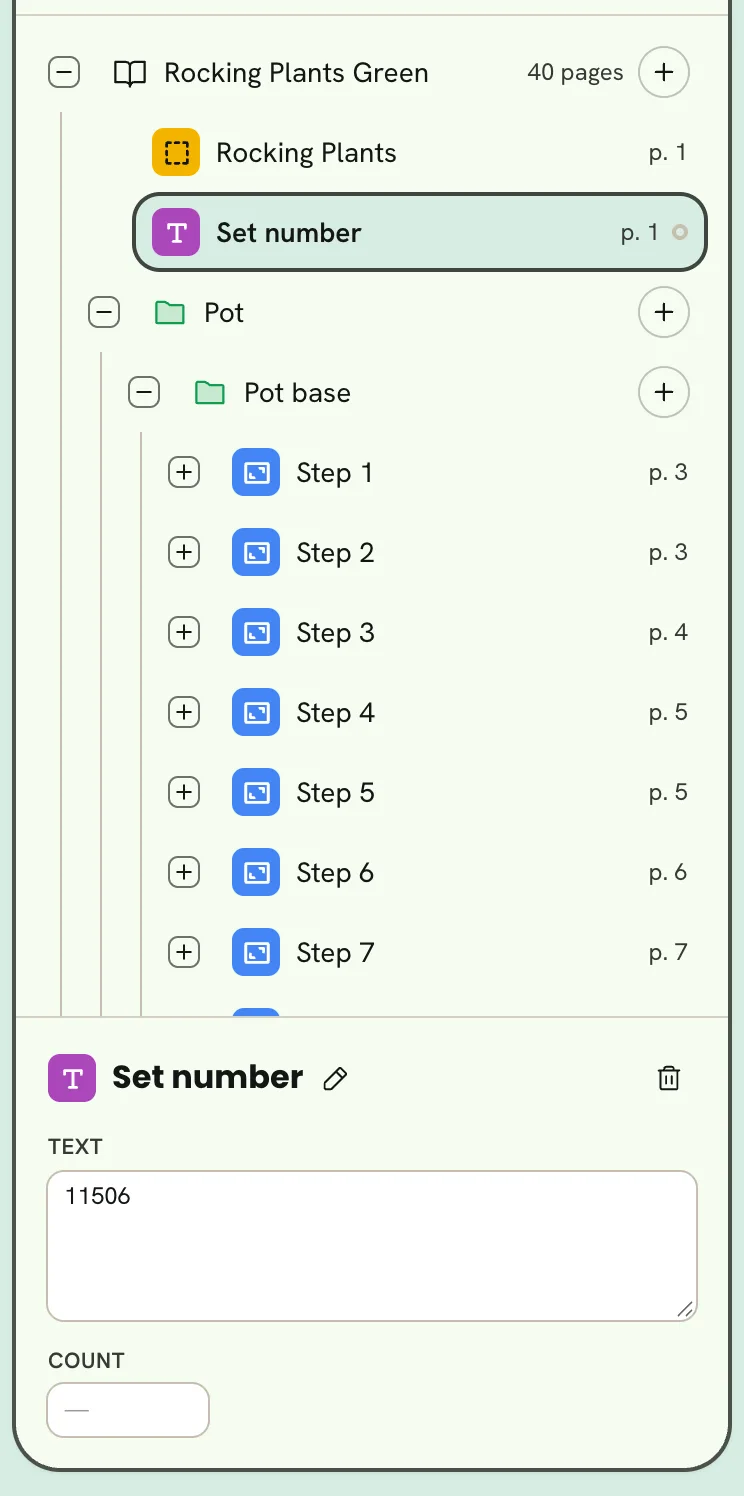
- 1The selected text
- 2Its words
Rename anything with the pencil next to its name, or remove it with the bin.
Groups and order
Groups gather steps into stages, like the bags of a building set or the parts of a recipe. Use the + on the manual or on a group to add a Group or a Step inside it.
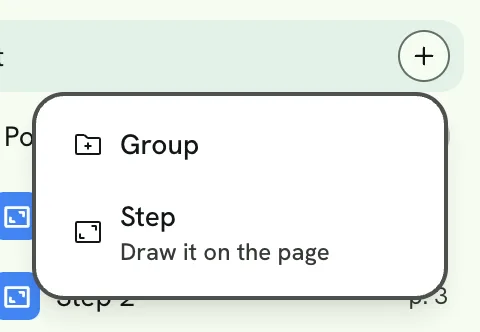
- 1Add to this group
- 2Group
- 3Step
Drag rows in the asset tree to reorder them or move them into another group. A group can hold other groups; when they're nested as deep as they go, the menu says so. On a touch screen, the arrows at the end of a row open a menu with Move up, Move down and Move to…, and the eye beside them shows the row's built picture.
Colors and background
Most manuals print their pictures on a colored page. Remove background takes the page away around each picture, so the art stands on its own on the glasses.
- Remove color adds colors to take away as well, like a tinted panel behind a part.
- Keep color marks colors that must stay, when they're close to the page's color.
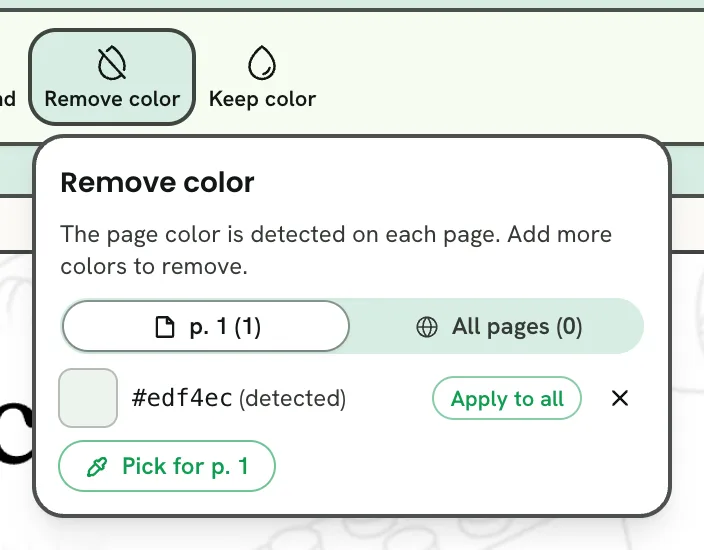
- 1Remove color
- 2Colors for this page, or all pages
Each panel has a tab for the page you're on and one for all pages. Pick a color from the page with Pick, edit it with its swatch, or use Apply to all to use a page's color on every page.
Preview and fix a picture
Select a step or an object and click Preview image to see the picture it will make, before you generate anything.
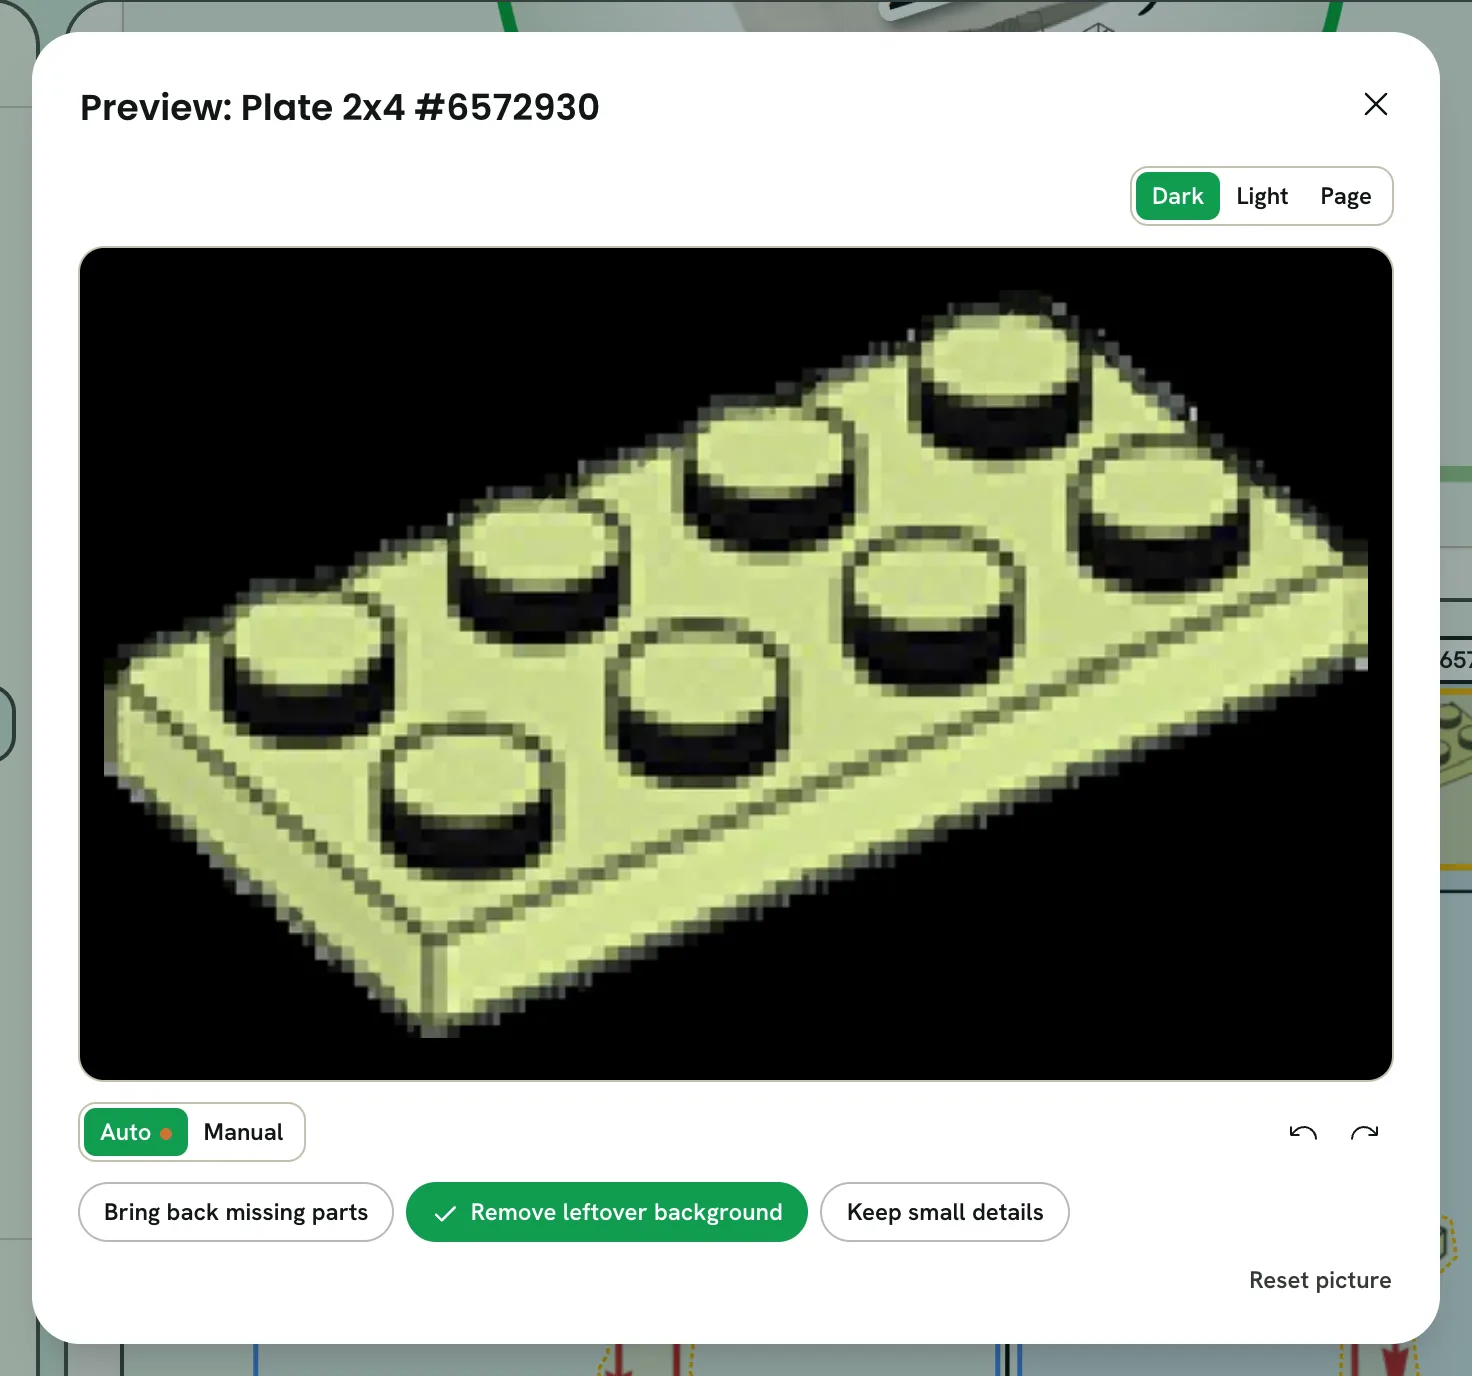
- 1Backdrop
- 2Auto fixes
- 3Manual touch-ups
- 4Reset picture
- The backdrop shows the picture on dark (as the glasses show it), light, or the page's own color.
- Auto has one-click fixes: Bring back missing parts, Remove leftover background and Keep small details. A fix that can't help this picture is turned off, and says why.
- Reset picture clears every fix for this picture.
The Manual tab is for what the fixes can't reach. Draw over the picture to Restore part of the page, Erase it, or Fill it with a color.
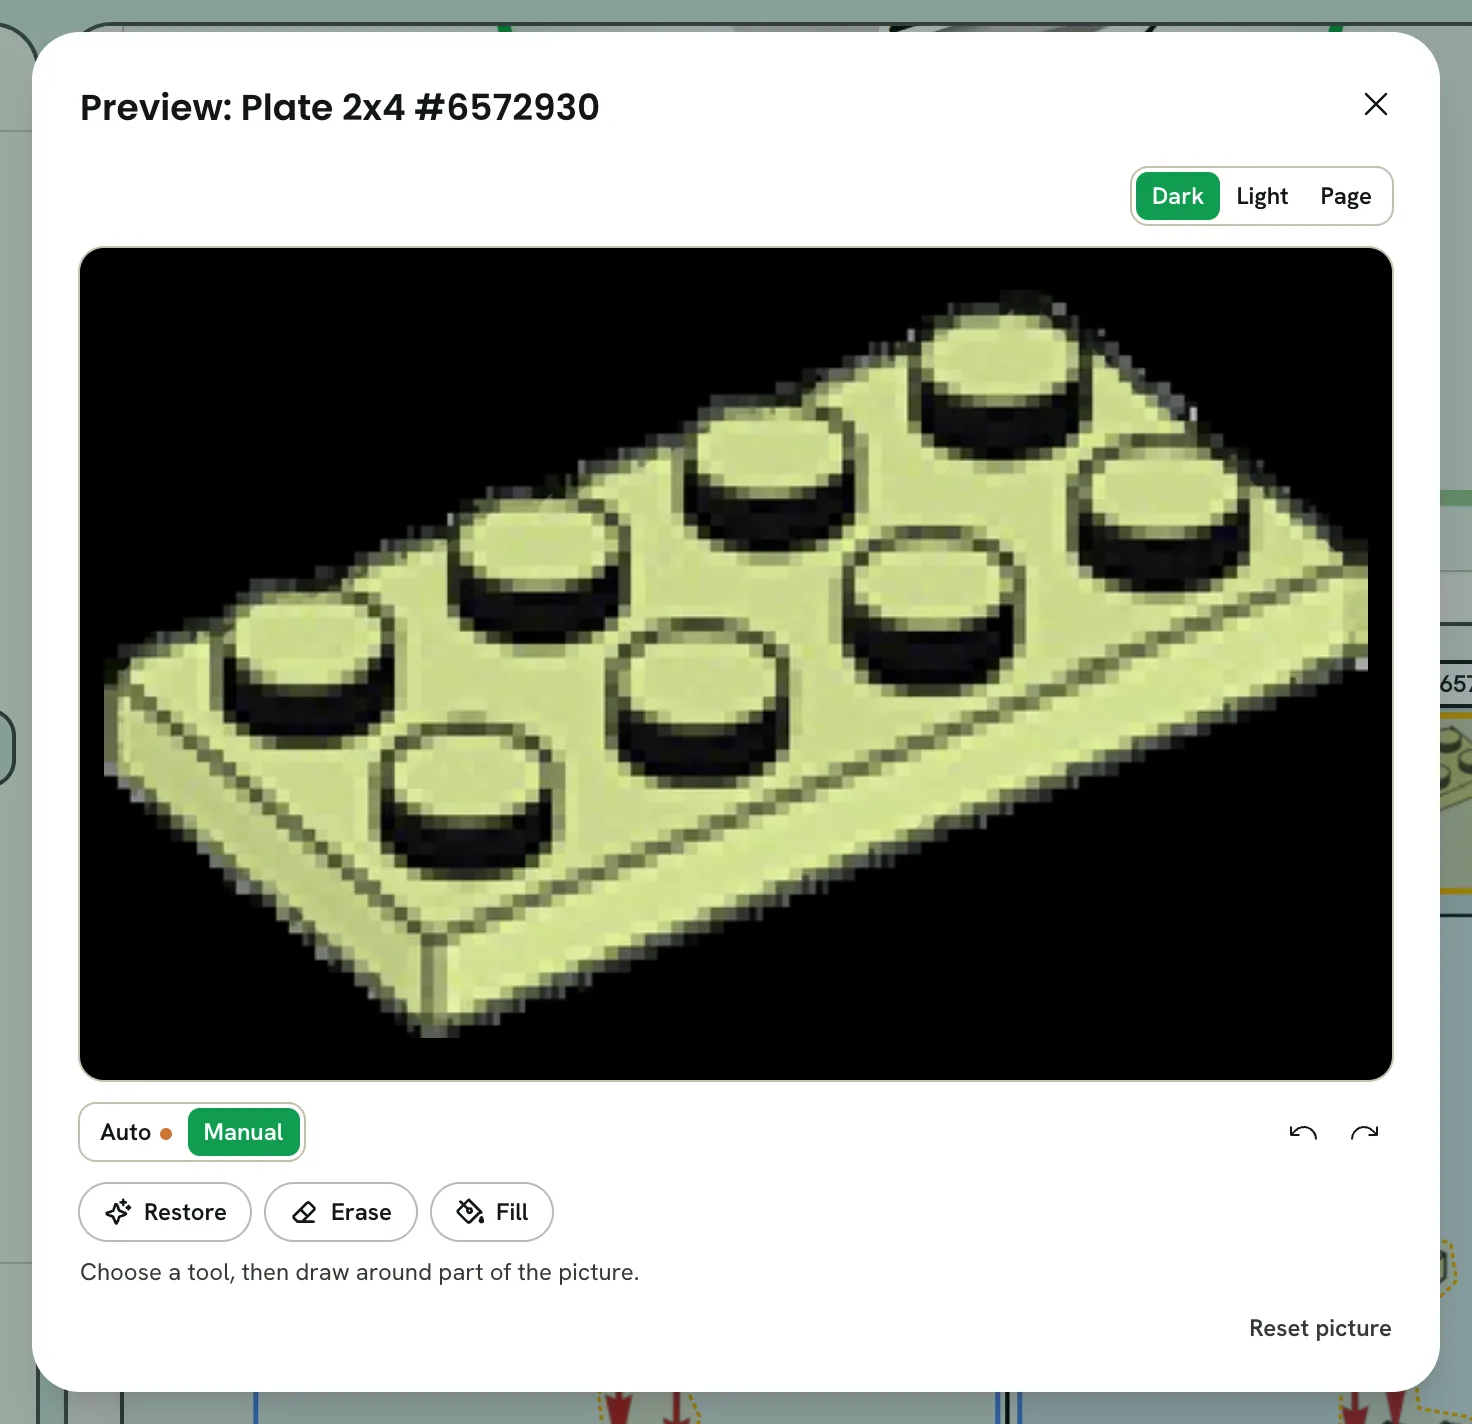
- 1Restore
- 2Erase
- 3Fill
Generate assets
When the pages are labeled, click Generate assets. It saves, then turns every region into its asset, and opens the asset library to show the job. If something would stop it, the checks list what to fix first.
Keys
| Key | Does |
|---|---|
| 1, 2, 3 | Step, Object, Text |
| O | Switch objects between box and polygon |
| Esc | Close the checks, stop picking a color, stop drawing, then deselect |
| Delete | Remove what's selected |
| ⌘Z, ⇧⌘Z | Undo, redo |
| ⌘S | Save |